Hiking safety can be incredibly overwhelming when you are starting out. Venturing into the backcountry or even the trails behind your neighborhood necessitates leaving your comfort zone and being responsible for the safety of you and your group. A successful hike is not just about reaching your objective, but it is about reaching your objective and returning home SAFELY. In this guide, we’ll walk through essential tips and precautions to ensure that you have a safe and enjoyable hiking experience.
If fear fro your safety has prevented you from getting out there yet, I’m sharing the top tips, tricks, and info that you need to help you minimize hiking dangers so you can feel confident enough to step out the door and enjoy the outdoors
Trail Research
The first step to a safe hike is proper trail research. Not all trails are created equal, and knowing what to expect can make all the difference. I typically follow a couple of steps to be sure that there won’t be any surprises on the trail that I’ve chosen. :
- Checking trail conditions: Are there any closures, hazards, or maintenance work in progress?
- Reading trail reviews: Get insights from fellow hikers on difficulty levels and any specific challenges.
- Reviewing maps: Familiarize yourself with the trail layout and any potential alternate routes.
- Downloading your map: Make sure that you have an ‘offline’ version of your route in case you end up out of cell coverage
My favorite tool for trail research is AllTrails. For most trails, you are able to read reviews of the trail from people who have just recently been on it. Its great for getting a sense of how conditions are on the hike and if there are any obstacles or detours to be aware of among other things. One of my favorite things about AllTrails+ (their premium subscription) is that you are able to download maps of your routes for offline use. This functionality is great when you are hiking outside of cell phone range.
Choosing Based on Your Ability
It’s crucial to choose a hike that matches your abilities. Hiking is definitely tempting to pick a hike based on the stunning views at the end. But its easy to get in over your head if you don’t pick a hike that works for your personal fitness levels. The two big factors that you should consider are total distance and total elevation gain.
Its good to have an idea of how far you can comfortably hike in a day. As a general rule of thumb, when I am planning a hike I usually plan on each mile taking somewhere between 30-45 minutes. That said, if the hike has a lot of vertical, then I’ll pad that estimate up to 60 minutes per mile.
Elevation difficulty can be challenging to determine if you are a newbie. I find that elevation really supercharges the difficulty of a hike. If you are just starting out, I would start with hikes that are under 1,000 feet of elevation gains. Once you’ve built confidence there you can start ramping up the elevation on future hikes.
Lastly, if you’re hiking and you realize that a trail is taking longer than you had planned, or is much harder than you anticipated, there is absolutely NO SHAME in turning back. Knowing when to trust your judgment is critical when you are out in nature.
Prepare for Altitude
If you are hiking at high altitudes (over 6,500 feet) there is always a risk of altitude sickness. Altitude sickness can cause symptoms like headaches, nausea, and dizziness. It is essential to not take it too fast when you are hiking at altitude and always keep an eye out for the signs of altitude sickness.
My dad had a 3 week backpacking trip cut short in the first week because he did all of his training in Texas at sea level and took off too fast on his hike in Colorado. He took it too fast and had to bail from the hike early. One of the best ways to avoid altitude sickness is to try to spend time at higher elevations before you hike to get your body used to the altitude.
Aside from taking it slow and acclimating, its important to stay hydrated with electrolytes. I love Nuun tablets for easy to drink hydration.
Weather Forecast
Getting caught in a storm or being otherwise unprepared for the weather can pose major risks to the safety of you and your group. In order to make sure that you are appropriately prepared, it is critical that you ALWAYS check the weather before you head out the door on your hike.
A mistake that we always made when we were living in California was not checking the weather where we’re GOING to go hiking. The weather might be sunny and 75 at home, but snowing less than 2 hours away! We use the apple weather app for the most part which is informed by data and models from the National Weather Service and the Weather Channel.
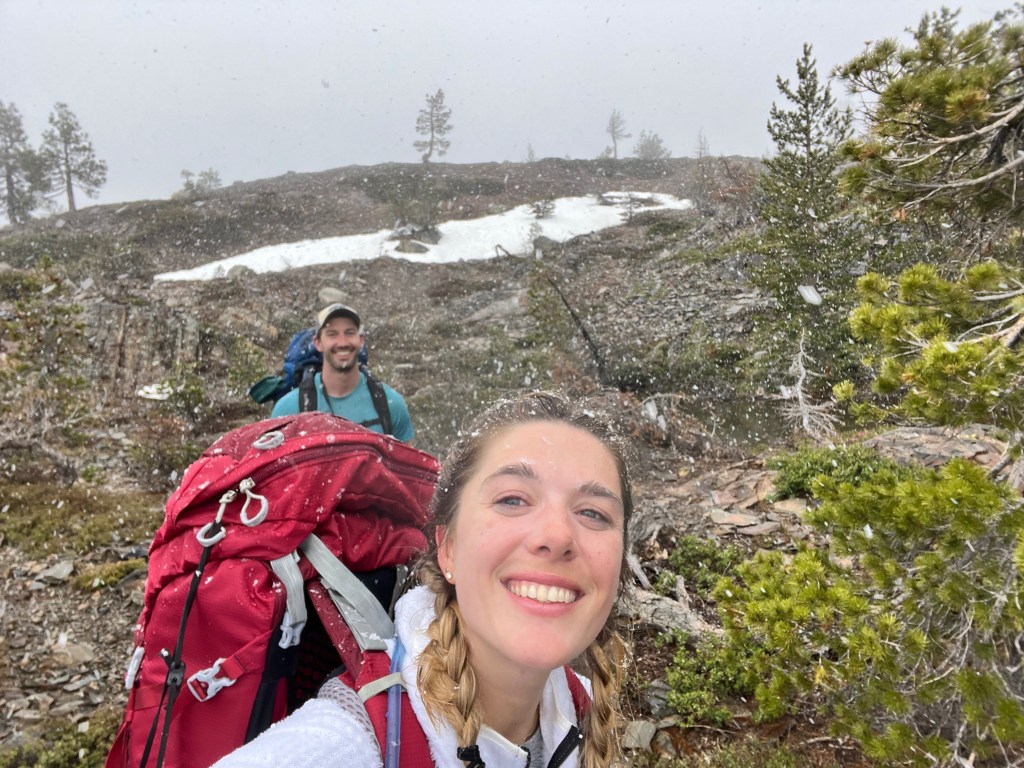
When it comes to hiking, especially in the mountains it is important to pay attention to your surroundings, and that includes the sky! On a June hike near Tahoe a couple of years ago we ignored the signs of inclement weather and got caught in a pretty nasty snowstorm. We had to pull off short of where we had planned to hunker down for the night and put up our tent in a snowstorm.
And once you know what’s coming you have to pack the right gear for the weather.
Wear the Right Clothing
Once you have a sense for what the weather looks like, you can decide what you want to wear. Its important to wear clothes that are appropriate for the weather. In the summer you want to be sure that your clothes will keep you cool, dry, and protected from the sun. In the winter, you want to be sure that your clothes will keep you warm, dry, and protected from wind and rain.
The key to staying comfortable, dry, and safe on a hike is to ensure that you are wearing lightweight, sweat wicking, quick dry clothes that are easy to layer. You want to make sure that the layers closest to your body stay dry to prevent chafing and ensure that you are able to regulate your body temperature. Check out our what to wear hiking post for more detailed thoughts on the perfect hiking gear!
Last but not least, even if the weather looks clear, I like to pack a lightweight rain jacket and an extra layer just in case.
Pack Enough Food and Water
You’ll want to pack plenty of food and water for your hike. I always like to bring a little bit more than I think I need just in case!
Water:
Amount: Water is arguably the most important item you’ll carry on your hike. The rule of thumb for water is ~1 liter of water for every 2 hours of hiking. If its hot, or you are doing a strenuous uphill hike, you’ll want to carry more. All of my packs have a camelback insert which I love. It keeps my water accessible and makes it easy to carry 2+ liters comfortably.
Hydration: I like to add electrolytes to my water to ensure that I am replacing the electorlytes and minerals that I lose when I sweat. I love adding Nuun electrolyte tablets to my water in my water bottles or hydration packs. I find that they don’t have too much sugar so cleaning isn’t any more difficult than with plain H2O.
Water filtration: If you are hiking a longer trail, or for multiple days you might need to refill your water from water sources along the way. You have a couple of options for these types of hikes: a water filter, or water purification tablets. You will want to check reviews on alltrails or trail maintenance websites to make sure that there is water available.
Snacks
Snacks are an essential (and very fun!) part of sustaining your energy as you push yourself on the trail. I like to bring a variety of high calorie snacks that I know I’ll enjoy. I don’t overthink their macros but I generally bring some combination of a sandwich, granola bars, sour candy (I love sour patch kids), and meat sticks. Its all about variety and bringing the things that you are going to want to eat. I find that I can really feel my mood and energy levels sag when I am starting to get hungry on the trail – and noone likes a hangry hiker!
Pack the 10 Essentials
The 10 essentials are a set of items that can save your life in emergency situations. I like to carry most or all of these on each hike that I go on. The list was developed to keep people safe on hikes and prevent emergencies. The idea is that you should be able to survive in the event that things don’t go to plan on your hike.
- Navigation tools (maps, compass, GPS)
- Sun protection (sunglasses, sunscreen)
- Insulation (extra clothing)
- Illumination (headlamp or flashlight)
- First-aid supplies
- Firestarter supplies (matches, lighters, etc.)
- Repair kit and tools
- Nutrition (extra food)
- Hydration (extra water)
- Emergency shelter
This list can seem like a lot! And if you are heading out on a short loop in a really popular area you might not need everything on the list. However, if you are headed out somewhere more remote, you probably want to take a close look at the 10 essentials.
The great news is that these are all pretty small and unless you are hiking alone, you can share the load. Will and I typically each carry a backpack on our day hikes which means that we have plenty of room to carry the 10 essentials.
Know What Time the Sun Sets & Prepare for Dark
It might be common sense, but you should always be aware of what time the sun sets where you’ll be hiking. Hiking in the dark (especially if you don’t have a light source) increases your chances of getting lost, running out of supplies, and not having the proper clothing for cooler night temps. One of the tricky things about hiking in the mountains is that even if the sun sets at 6 pm, it can start getting dark in behind the mountain and in valley much earlier. I rely on two key actions to keep me safe
- Keep an eye on the time: Plan your hike to ensure you finish before darkness falls and have a plan for what time you should turn around, even if you haven’t reached the summit.
- Carrying a headlamp: In case you do find yourself on the trail after sunset, a headlamp is invaluable. I love the <<HEADLAMP>>. I actually always bring it with me just in case.
Take Care of Your Feet
Your everyday tennis shoes can be great on easier, entry level hikes but there is a huge difference between a pair of casual every day tennis shoes and shoes that are purpose made for hiking. Hiking shoes provide a lot more grip and traction in their soles due to their thicker and grippier tread. They also provide better stability and protection for your ankles and feet. As you start venturing out onto tougher trails, I encourage you to explore getting some hiking shoes as the added stability and tread makes them much safer.
- Invest in quality hiking shoes: Choose shoes that stabilize your foot, provide ankle and arch support, and have good traction to minimize slipping
- Break in your shoes: I don’t recommend wearing new hiking shoes for the first time on a long or strenuous hike. This way you can get a sense for any hot spots or blisters that your new shoes cause.
- Use moisture-wicking socks: There is nothing worse than soggy socks and the blisters that follow! I always recommend reaching for non-coton hiking socks as cotton is liable to get wet, stay wet, and give you blisters. My favorite brand is Darn Tough. Darn Tough socks are made with sweat wicking wool and synthetic materials and I find that they aren’t liable to shift around in my boot.
- Carry blister prevention: I have pretty tender feet that are prone to blistering even if I have the perfect socks and shoes. I like to carry around blister protection from Band aid and hike goo to treat hot spots on the go.

Know Where You Are On-Trail
Getting lost is one of the most common reasons hikers need to be rescued so its important to have a grasp on basic navigation skills before heading out there. Thankfully for most trails it is pretty straightforward!
On the trail
Most trails are very well marked. You should be able to follow the trail by visual cues whether it is the trail itself, or trail markers as long as you are keeping an eye out, you should be able to avoid wandering off trail.
Phone GPS
With hiking apps like AllTrails you can download the trail maps that you need before heading out so that you can access them even when you don’t have phone service. For shorter trails, I use my phone. But the apps can really quickly drain your battery. If you are relying on your phone, you’ll want to make sure that your phone is fully charged.
Wearable GPS
As I have gotten more and more adventurous with my hikes, I have started using my Garmin to track my hikes. It has a battery life of over 10 days (which is great for multiday trips) and comes with maps preloaded.
Learn Basic First Aid
Just like with anything else in life, accidents can happen on the trail. When accidents do happen, it is important to both have the necessary supplies and the skills to use them. I also feel better hiking with a first aid kit knowing that if I come across someone else on the trail who needs help, I will be able to help them out. We’ve got to take care of each other on the trail!
- Take a course: Consider taking a wilderness first aid course to learn more comprehensive skills and techniques. I would absolutely recommend this if you spend a lot of time in remote areas. These differ from traditional first aid courses as they cover some of the unique situations and considerations (distance from aid) that you are likely to come up against in the wilderness vs. in the city
- Pack a first-aid kit: I typically start with a basic hikers first aid kit from an outdoors store but you can absolutely make your own. Its also worth taking a look at what it comes with and making any additions that you might want to make. For example, I always carry around benadryl as my mom had a weird reaction to a bee a couple years ago. Some things just stick with you!
Be Aware of Local Wildlife
When we’re out hiking, we are encroaching on the natural habitat of native wildlife. Some of them are very cute and some of them are very scary. Regardless of whether they are cute little squirrels or scary black bears, it’s always best to avoid contact with animals and NEVER EVER feed them. Side note: this is actually one of my biggest pet peeves in really popular areas like national parks. PLEASE don’t feed the wildlife, not even the cute ones. We want them to remain wild and not learn that humans = food.
I like to make a practice of making noise on my walks so that I don’t surprise any wildlife. Chatting with your group, whistling to yourself, or even humming to yourself can help you give wildlife a warning that you are around. Most animals want to avoid you as much as you want to avoid them!
If you’ll be hiking in grizzly bear country (which we often are in northern BC) you’ll want to hike in a group and talk as you walk so that bears can hear you and avoid you. You should also carry bear spray. Definitely read the instructions and have a plan for how to use and access your bear spray quickly in the event that you run into an aggressive bear. Its not something you’re going to want to figure out in that moment!
Be Aware of Your Surroundings
Hiking can take you outside of cell phone range and puts you in contact with strangers on the trail. For the most part, I have found all of these interactions to be overwhelmingly positive. That said, not all encounters with people on the trail are friendly. Keeping situational awareness while hiking is critical for staying safe.
If you like to listen to music or podcasts on the trail avoid wearing both earbuds or opt for headphones that allow you to hear whats going on around you. I LOVE the Shokz OpenRun pro headphones. They transmit sound via bone conduction so they don’t have to sit in your ear. This means that you are still able to hear whats going on around you and ensure that you can hear if someone is approaching you. I wear mine ALL the time. From hiking to running to dog walking. Anytime I’m outside I like to keep a pulse on my surroundings and I love the Shokz headphones allow me to continue to do that while listening to music.
Share Your Plan with Someone
No matter how many times you have hiked a trail or how confident you are about your hike, you should always inform someone about your hiking plan including the trail you are planning to take & trailhead you are starting from, when you plan to start, and when you plan to return.
In the event that anything happens to you, this gives your loved ones a really helpful list of details to share with search and rescue. Its as easy as sending a quick text to a friend or family member.
I also share my location on apple with mom so she can see where I am and whether I have made it back from my hike.
Have a Way to Communicate
If you KNOW that you will be in cell phone service you can absolutely use your cell phone as an emergency communication device. I like to be sure that it is fully charged, and try to conserve battery as much as possible.
If I won’t have access to cell service, I like to pack my Garmin inReach mini. It is a GPS communication device that allows me to send and receive text messages out of cell phone range. I can even call for help and share my coordinates in the event that I need to be rescued.
Be Prepared for Bugs
One thing I always look for in trail reviews is details on how the bugs are. If I read that there are lots of mosquitoes or ticks on the trail I adjust my plans accordingly. Even if there aren’t reports of bugs, I like to bring along a small bottle of bug spray just in case.
If the odds of ticks are high and/or the mosquitoes are bad I will wear long pants with high socks and long sleeves – even in the summer. Those bugs can carry some nasty diseases and I like to err on the side of caution!
Trust Your Instincts!
Lastly, always trust your instincts. If something doesn’t feel right, it probably isn’t. Don’t hesitate to turn back or seek help when needed. When you’re out in nature you can be quite far away from quick help. Its important to listen to your instincts, manage your risk, and even turn around if you need you.
Hiking can be an incredible adventure, and with the right precautions, you can enjoy the great outdoors safely. Remember, the journey is just as important as the destination, so stay safe, stay prepared, and happy hiking!